Quick Start
This is a quick start guide to run DQL queries and mutations. For an interactive walkthrough, take the tour.
This guide helps you:
- Understand how JSON data are represented as a graph
- Query the graph using DQL
- Use indexes
Step 1: Run Dgraph
The easiest way to get Dgraph up and running is using the Dgraph Cloud.
You can Login to Dgraph cloud using Sign in with Google, Sign in with GitHub or any other email account that you prefer to use.
- In the Dgraph cloud console, click Launch new backend.
- Select a plan, cloud provider, and region that meets your requirements.
- Type a name for your Dgraph cloud instance.
- Click Launch
- Click Ratel to access the UI that provides browser-based queries, mutations and visualizations.
Step 2: Run Mutation
The create, update, and delete operations in Dgraph are called mutations.
Ratel makes it easier to run queries and mutations.
- In the Console page, select Mutate tab.
- Paste the following:
   {
   "set": [
     {
       "name":"Star Wars: Episode IV - A New Hope",
       "release_date": "1977-05-25",
       "director": {
         "name": "George Lucas",
         "dgraph.type": "Person"
       },
       "starring" : [
         {
           "name": "Luke Skywalker"
         },
         {
           "name": "Princess Leia"
         },
         {
           "name": "Han Solo"
         }
       ]
     },
     {
       "name":"Star Trek: The Motion Picture",
       "release_date": "1979-12-07"
     }
   ]
 }
The input data is in JSON Format. Dgraph also supports RDF notation.
The sample JSON data is an array of two movies with some attributes. These are stored as Nodes in Dgraph.
There will be stored as Nodes in Dgraph.
The “Star Wars” movie has a director field which is an JSON object and a starring field which is an array of JSON objects.
Each object is also stored as a Node in Dgraph . The director and starring are stored as relations.
- Click Run to execute the mutation.
View the Dgraph response in the JSON tab:
{
  "data": {
    "code": "Success",
    "message": "Done",
    "queries": null,
    "uids": {
      "dg.1119451236.100": "0xfffd8d726c1de414",
      "dg.1119451236.101": "0xfffd8d726c1de40f",
      "dg.1119451236.102": "0xfffd8d726c1de410",
      "dg.1119451236.103": "0xfffd8d726c1de411",
      "dg.1119451236.104": "0xfffd8d726c1de412",
      "dg.1119451236.99": "0xfffd8d726c1de413"
    }
  }, ...
Dgraph displays the universal identifiers (UID) of the nodes that were created.
Step 3: First query
- In the Console page, select Query tab and run this query:
   {
    movies(func: has(release_date)) {
    name
    director { name }
    starring { name }
     }
    }
The query lists all movies that have a release_date and for each, it looks for the director and starring relations and provides the name attribute of the related nodes if any.
- In the response panel, select Graph, to view a Graph output:

Query result
Step 4: Alter Schema
Alter the schema to add indexes on some of the data so queries can use term matching, filtering and sorting.
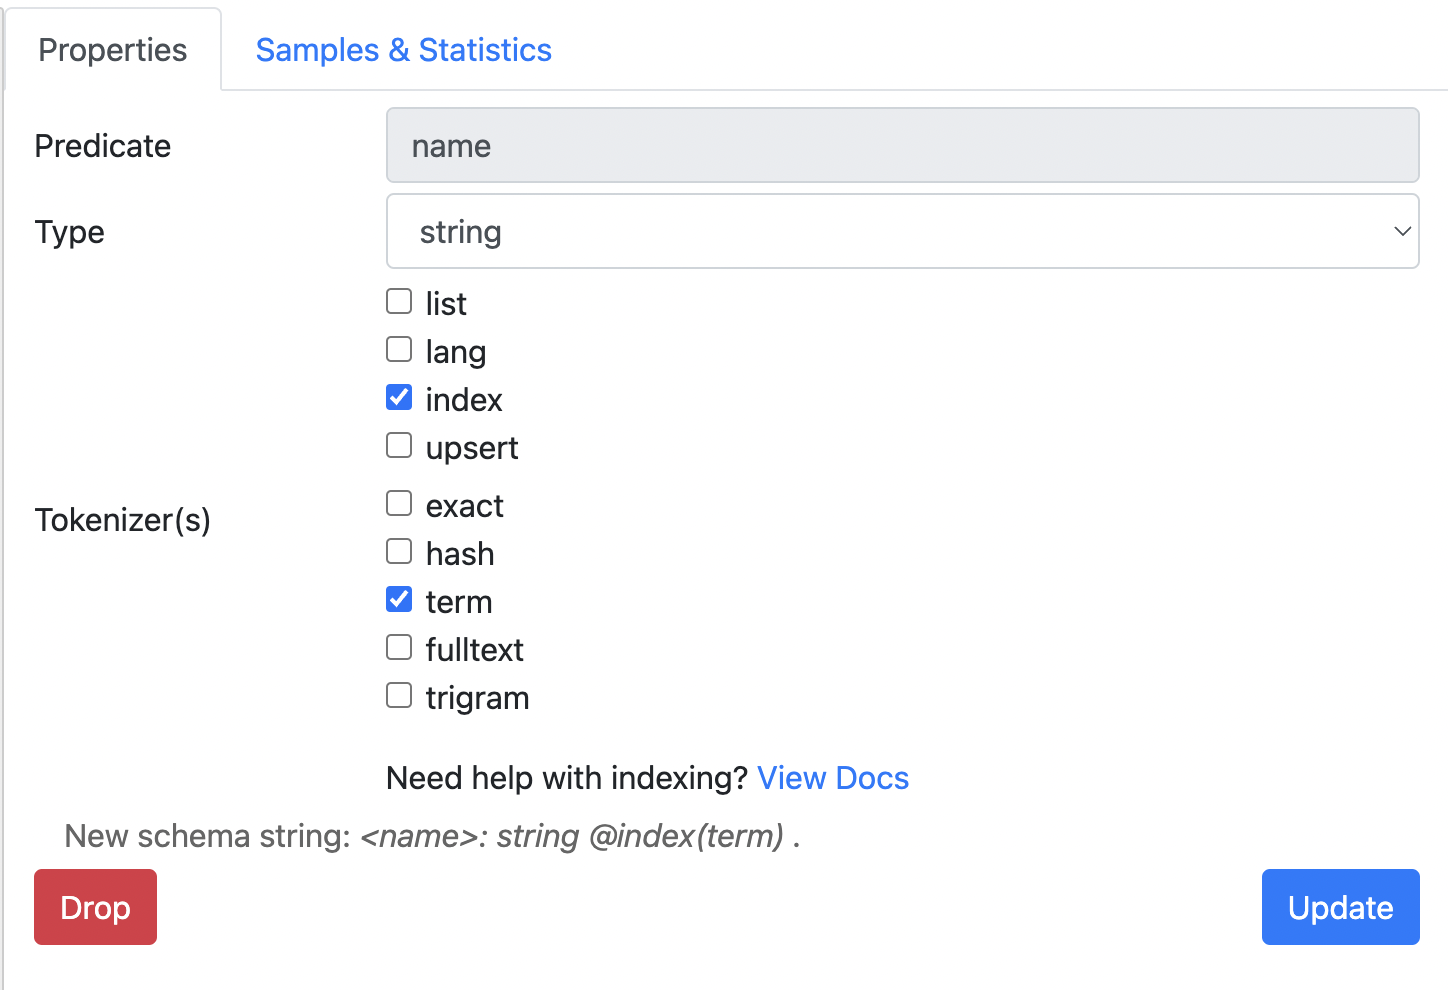
- In the Schema page, select Predicates.
Dgraph creates and displays the predicates
name,release-date,directorandstarring. A predicate is Dgraph internal representation of a node attribute or a relation. - Select the
namepredicate. Ratel displays details about the predicate type and indexes. - Select index and select term for
namepredicate. - Click Update to apply the index.

Adding an index
Set the index for the release_date:
- Select
release_datepredicate. - Change the type to date
- Select index and choose year for the index type.
- Click Update to apply the index on the
release-datepredicate.
Step 5: Queries using indexes
Let’s get the movies having the term “Star” in their name and released before “1979”.
In the Console page select Query tab and run this query:
{
  me(func: allofterms(name, "Star"), orderasc: release_date) @filter(lt(release_date, "1979")) {
    name
    release_date
    revenue
    running_time
    director {
     name
    }
    starring (orderasc: name) {
     name
    }
  }
}
Observe the JSON result and the graph result.
You can play with the release date and the search terms conditions to see Dgraph search and filtering in action.
In these five steps, you set up Dgraph, added some data, visualized it as a graph, added indexes and queried the data .
Where to go from here
- Take the Tour for a guided tour of how to write queries in Dgraph.
- A wider range of queries can also be found in the Query Language reference.
- Go to Clients to see how to communicate with Dgraph from your application.
Need Help
- Please use discuss.dgraph.io for questions, issues, feature requests, and discussions.